Authenticating users securely is a critical component of modern web application development. AWS Cognito provides a robust, scalable user directory that handles user sign-up, sign-in, and access control.
In this guide, we will walk through the process of configuring an AWS Cognito User Pool to support authentication via both standard Email/Password and Google Sign-In (OAuth 2.0).
Prerequisites
- An active AWS Account.
- A Google Cloud Platform account.
- A backend/frontend application ready for integration (referenced as
localhostin this guide).
Step 1: Configure Google OAuth Credentials
Before setting up AWS, we must first tell Google that our application exists and requests permission to authenticate users.
- Navigate to theGoogle Cloud Console.
- Create a New Project (e.g.,
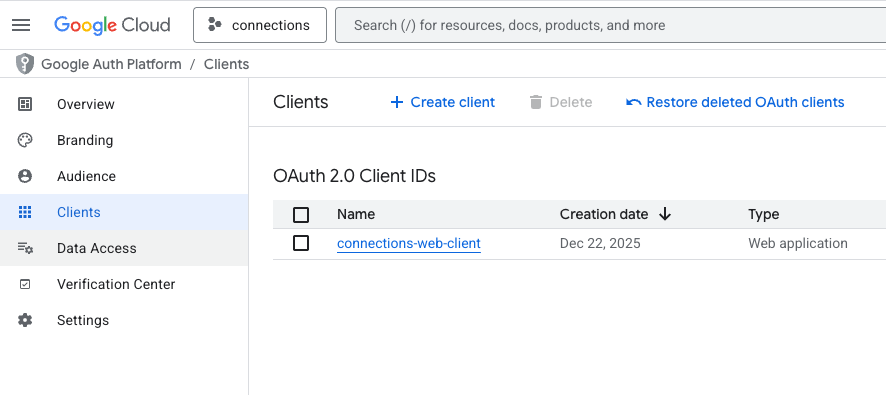
my-auth-project). - On the left sidebar, select APIs & Services > Credentials.
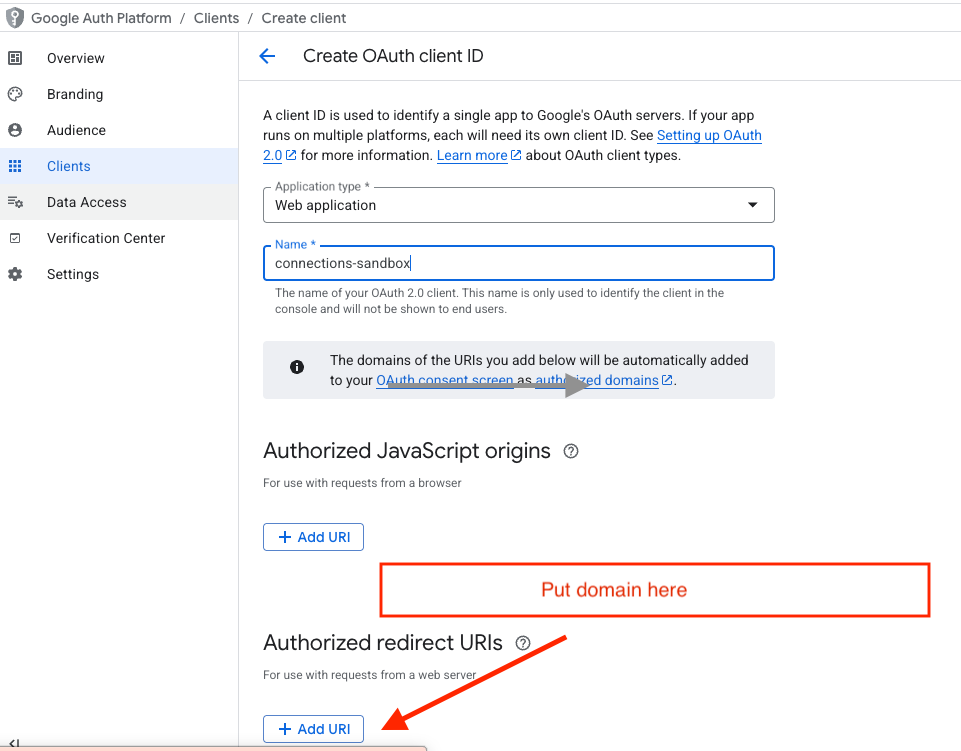
- Click Create Credentials and select OAuth client ID.
- Note: If prompted, you may first need to configure the "OAuth consent screen". Fill in the required app information.
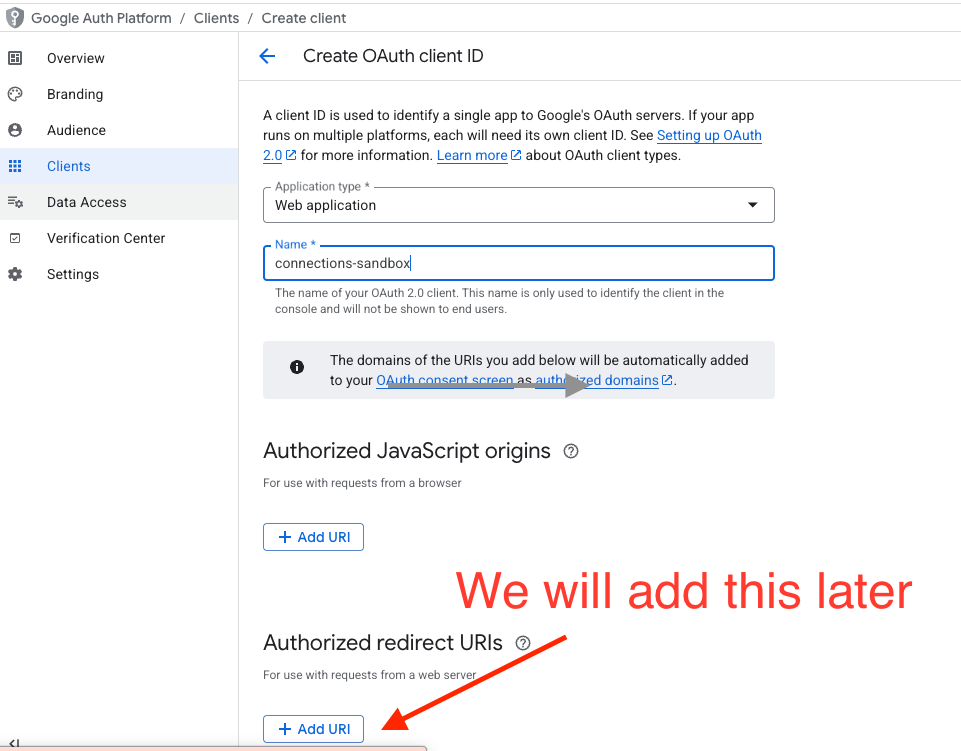
- Select Web application as the application type.
- Click Create.
Action Item: Once created, download the JSON credentials file or copy the Client ID and Client Secret. You will need these strictly for Step 3.
Step 2: Create an AWS Cognito User Pool
Now, we set up the user directory in AWS that will manage your users' identities.
- Log in to the AWS Console and navigate to Amazon Cognito.
- Click Create user pool.
- Configure Sign-in Options:
- Select Email and Phone number as valid sign-in identifiers.
- Configure Security Requirements:
- Keep defaults or adjust password policies as needed for your organization.
- Configure Sign-up Experience:
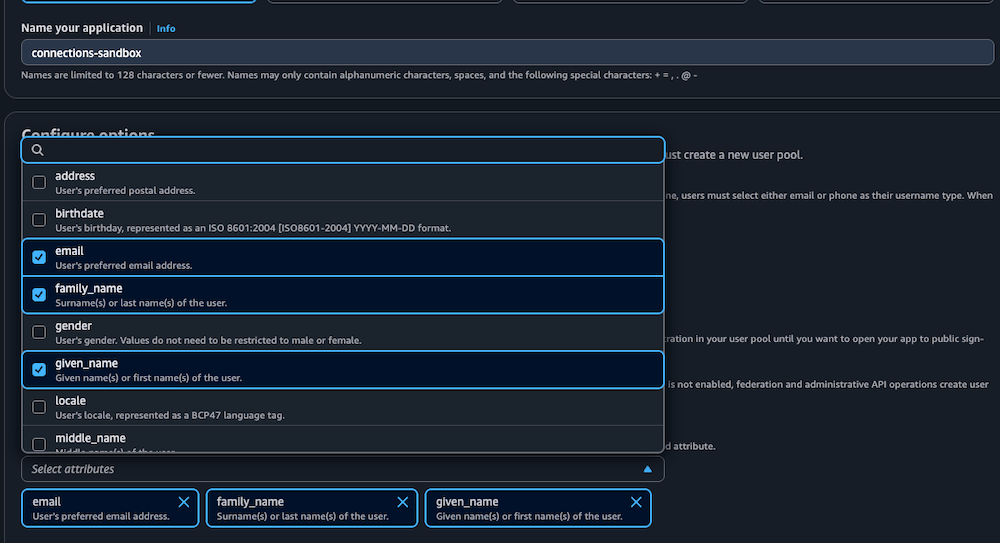
- Required Attributes: strictly select
email,family_name, andgiven_name. This ensures you capture essential user profile data during registration.
- Required Attributes: strictly select
(Note: We will return to configure the "Domain" and "App Client" settings in the upcoming steps.)
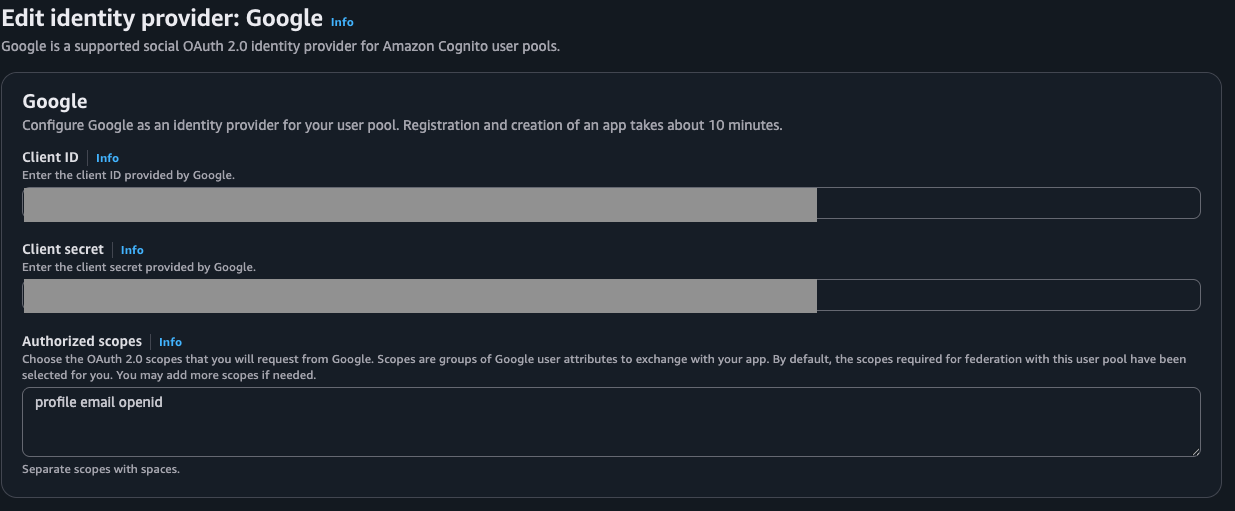
Step 3: Link Google as an Identity Provider
To allow users to "Sign in with Google," we must federate Google as an identity provider (IdP) within your User Pool.
- In your Cognito User Pool dashboard, navigate to the Sign-in experience tab.
- Locate Federated identity provider sign-in and click Add identity provider.
- Select Google.
- Enter Client Credentials:
- Paste the Client ID and Client Secret you generated in Step 1 (Google Cloud Console).
- Authorized Scopes: Enter
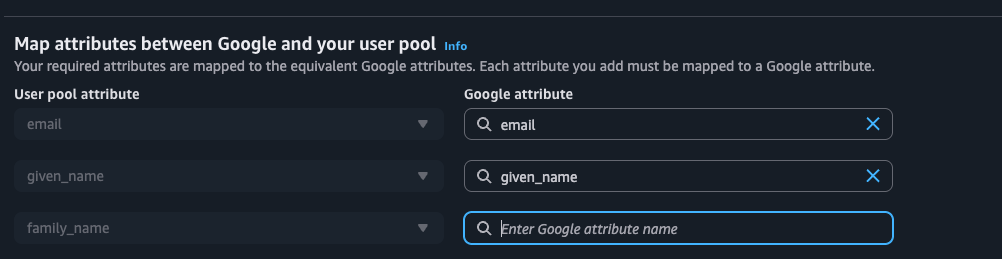
profile email openid phone. - Map Attributes:
- You must map the Google attributes to your Cognito attributes so data flows correctly.
- Map
email->email - Map
given_name->given_name - Map
family_name->family_name - (Refer to image in original post for visual aid).
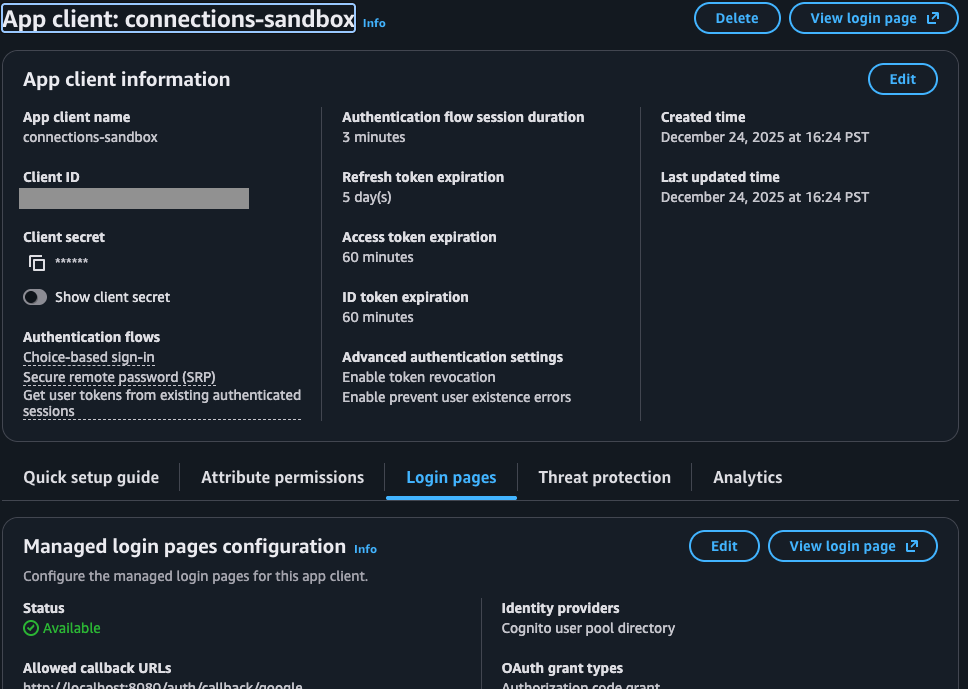
Step 4: App Client Configuration
The "App Client" is the entity your frontend application uses to interface with Cognito. We need to enable the Google provider for this client.
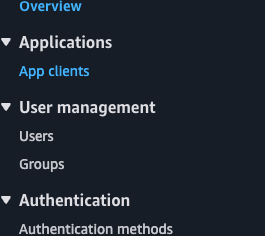
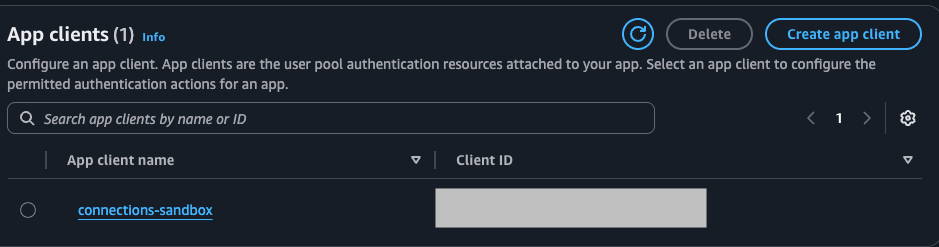
- Navigate to the App integration tab.
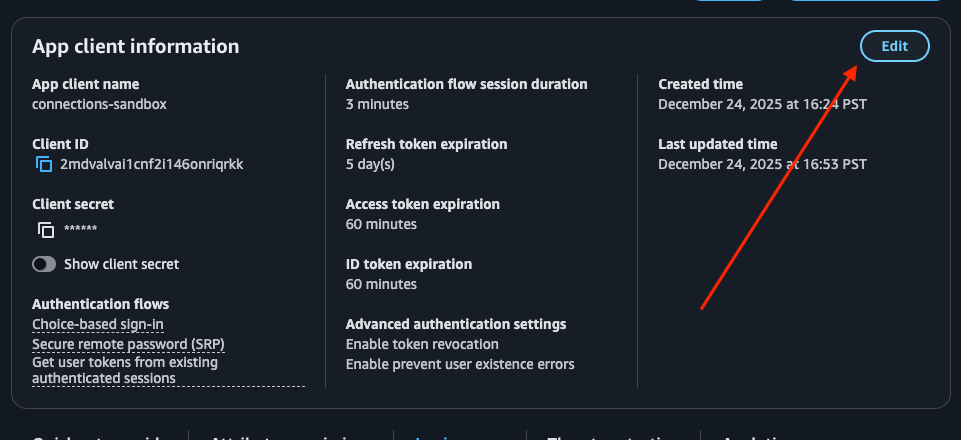
- Scroll to App clients and analytics and select your App Client (or create one if you haven't).
- Locate the Hosted UI section (or "Login Pages") and click Edit.
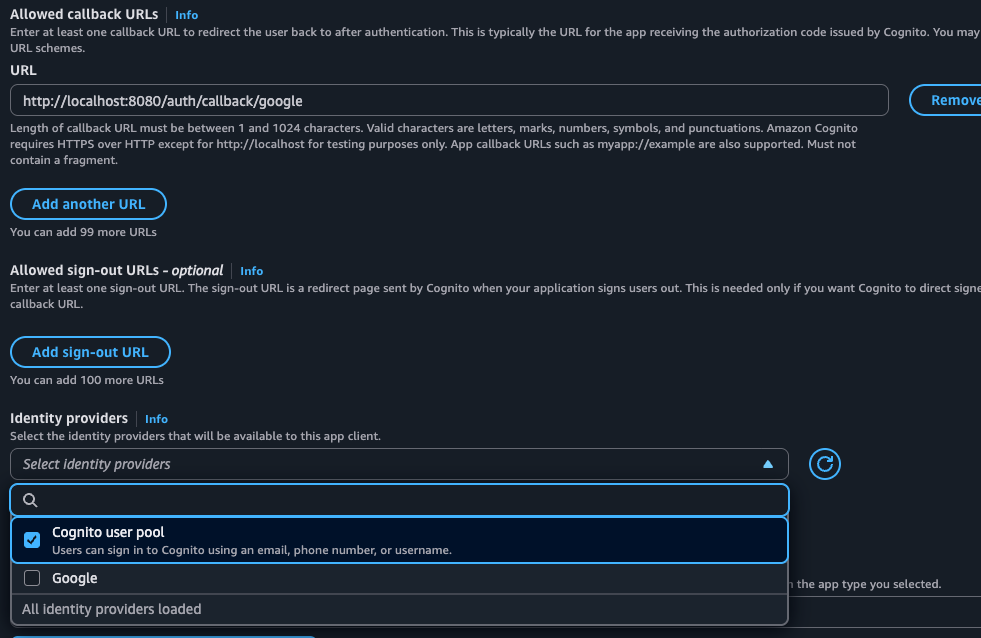
- Identity Providers:
- Ensure Google is checked.
- Ensure Cognito user pool is checked (for standard email/password login).
- OAuth Grant Types:
- Select Authorization code grant (recommended for security).
- Allowed Callback URLs:
- Enter your application's callback URL. For development, this is often:
http://localhost:8080/auth/callback/google
- Enter your application's callback URL. For development, this is often:
Step 5: Configure the Redirect URI (The Handshake)
This is the most critical step and a common source of errors. You must authorize AWS Cognito to receive responses from Google.
- In AWS Cognito, go to the App integration tab and locate your Domain section.
- Copy your Cognito Domain. It will look something like:
https://<your-domain>.auth.us-east-1.amazoncognito.com - Return to theGoogle Cloud Console.
- Go to APIs & Services > Credentials and edit your OAuth 2.0 Client.
- Under Authorized redirect URIs, add your Cognito Domain with a specific suffix:
https://<your-domain>.auth.<region>.amazoncognito.com/oauth2/idpresponse
Critical: You must append /oauth2/idpresponse to the end of your domain. Without this, Google will reject the authentication request with a "Redirect URI mismatch" error.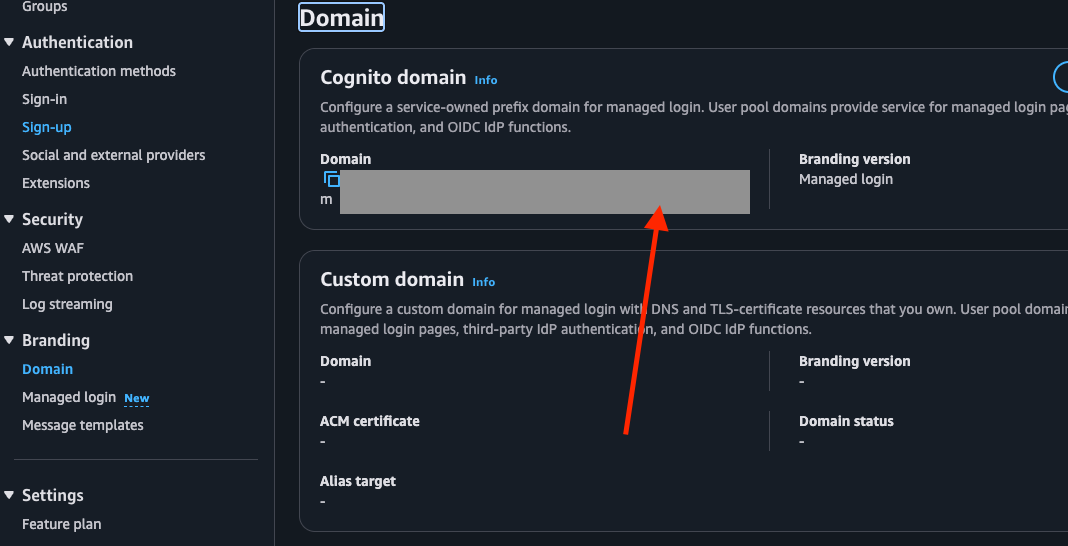
Step 6: Frontend Integration
Once your backend is configured, you will need the following environment variables to connect your frontend application to AWS Cognito.
Bash
# AWS Cognito Configuration
COGNITO_CLIENT_ID=5914xxxxxxxxxxxxxxxxx
COGNITO_CLIENT_SECRET=fakeshqjg3xxxxxxxxxxxxxxxxx
COGNITO_DOMAIN=https://see-domain-aws-cognito.auth.us-east-1.amazoncognito.com

# Your Backend Redirect
COGNITO_REDIRECT_URI=http://localhost:8080/auth/callback/google

# Frontend URL
FRONTEND_URL=http://localhost:3001
Final Configuration: Enable Self-Service
Return to the AWS Cognito console to verify one final setting.
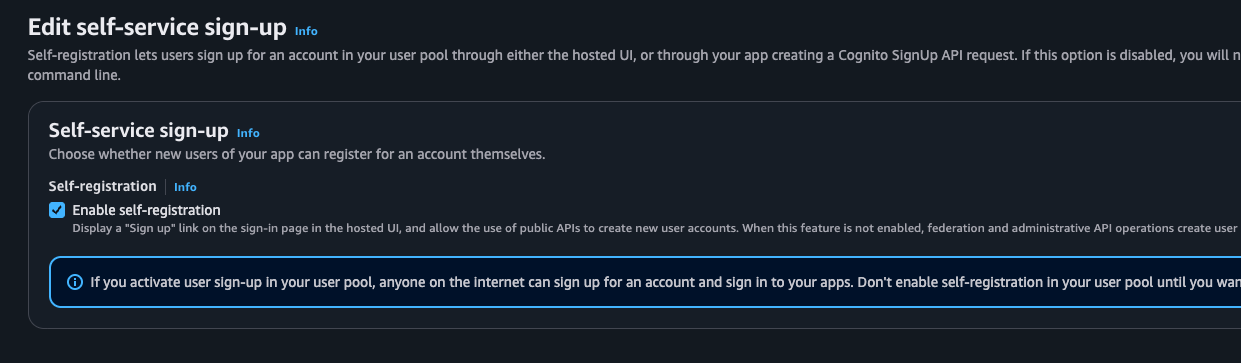
Note: Ensure Self-service sign-up is enabled (checked). This allows users to register themselves via the "Sign Up" link on your Hosted UI. If you disable this, only administrators can create new user accounts.
You are now ready to test the integration!