If you’re like me, you probably find yourself visiting sites like ezgif.com whenever you need to convert a video to a GIF. While those tools work, they can be slow, limited by file size, or full of ads.
I found a much easier, native way to do this directly on your Mac. Once it's set up, all you have to do is drag your video into a folder, and bam> the conversion happens automatically in the background.
Here is how to set up your own "Drop-to-GIF" folder using macOS Automator.
Prerequisites & Installation
Before we build the automation, your Mac needs two tools: Homebrew (a package manager) and FFmpeg (the engine that converts the video).
1. Install Homebrew
If you don't already have Homebrew installed, open your Terminal app (Command+Space, type "Terminal") and paste the following command (see complete homebrew installation step here - https://brew.sh/):
/bin/bash -c "$(curl -fsSL https://raw.githubusercontent.com/Homebrew/install/HEAD/install.sh)"Follow the on-screen instructions (you may need to enter your password).
2. Install FFmpeg
Once Homebrew is ready, install FFmpeg by running this command in Terminal:
brew install ffmpegStep-by-Step Guide
Step 1: Create Your Input Folder
First, create a specific folder on your Desktop (or anywhere you prefer) that will act as the "trigger."
- Create a new folder and name it "Gifin" (or "VideoToGif" or whatever you want).
Step 2: Open Automator
- Open Automator on your Mac.
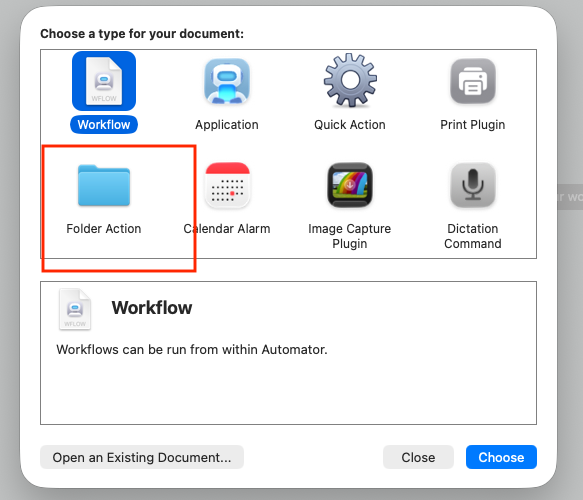
- Select File > New.
- Choose Folder Action as the document type and click Chose.
Step 3: Configure the Folder Action
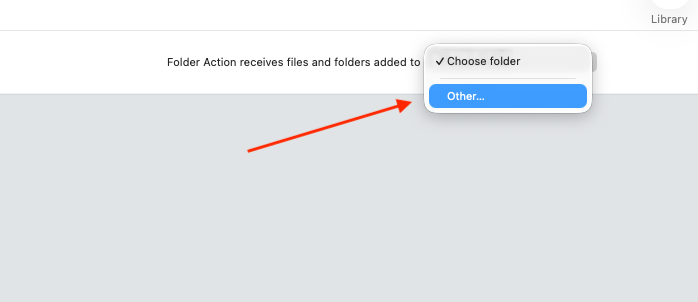
- At the top of the workflow window, you will see a dropdown that says "Folder Action receives files and folders added to".
- Click the dropdown, select Other..., and choose the "Gifin" folder you created in Step 1.
Step 4: Add the Shell Script
- In the left-hand sidebar search bar, type "Run Shell Script".
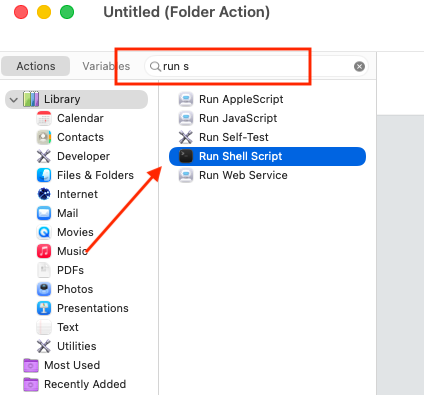
- Drag the "Run Shell Script" action into the main workflow area on the right.
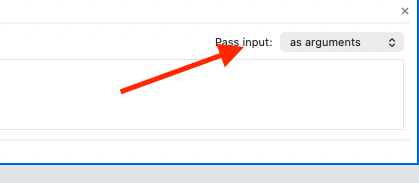
- Important: Change the settings in the script box to match these:
- Shell (or whatever shell you prefer such as
/bin/bash): I am using/bin/zsh

- Pass input:
as argument
Step 5: The Code
Delete any default text in the script box and copy-paste the code below.
Note: This script automatically detects if you are on an Intel or Apple Silicon (M1/M2/M3) Mac to find the correct path for FFmpeg.
# ==============================================================================
# DEPENDENCIES:
# This script requires FFmpeg. Install it via Homebrew: 'brew install ffmpeg'
# Note: Silicon Macs (M1/M2/M3) use /opt/homebrew/bin/ffmpeg
# Intel Macs usually use /usr/local/bin/ffmpeg
# ==============================================================================

# 1. PATH SETUP
# Define the absolute path to the ffmpeg binary so Automator can find it.
FFMPEG="/opt/homebrew/bin/ffmpeg"

# Audio notification so you know the process has begun without checking logs.
say "Start converting to gif"

# Start a loop to process every file dropped into the Automator action.
for f in "$@"
do
    # 2. SAFETY CHECK
    # If the input is a directory (folder) instead of a file, skip it to prevent errors.
    if [ -d "$f" ]; then
        continue
    fi

    # 3. DEFINE PATHS
    # watchedFolder: The directory containing the source video.
    # parentFolder: The directory one level above the source (e.g., Desktop).
    watchedFolder=$(dirname "$f")
    parentFolder=$(dirname "$watchedFolder")

    # outDir: Create a sibling folder called 'gifout' for the results.
    # 'mkdir -p' ensures the folder is created only if it doesn't already exist.
    outDir="$parentFolder/gifout"
    mkdir -p "$outDir"

    # 4. DEFINE FILENAMES
    # Extract the filename and remove the extension (e.g., "video.mp4" becomes "video").
    fileName=$(basename "$f")
    baseName="${fileName%.*}"
    outputFile="$outDir/${baseName}.gif"

    # 5. CONVERT TO GIF (High Quality Mode)
    # ffmpeg explanation:
    # -i "$f": The input video file.
    # fps=15: Sets the frame rate (standard for GIFs to balance smoothness and size).
    # scale=480:-1: Resizes width to 480px; '-1' keeps the aspect ratio automatic.
    # palettegen/paletteuse: A two-step process that creates a custom color palette
    # for the specific video, ensuring the highest possible GIF quality.
    # -loop 0: Makes the GIF loop infinitely.
    # -y: Overwrites the output file if it already exists.
    # < /dev/null: Prevents ffmpeg from stalling by closing the standard input.

    "$FFMPEG" -i "$f" -vf "fps=15,scale=480:-1:flags=lanczos,split[s0][s1];[s0]palettegen[p];[s1][p]paletteuse" -loop 0 -y "$outputFile" < /dev/null

    # 6. CLEANUP (Optional)
    # If the conversion succeeded ($? -eq 0), you could delete the original video.
    # This is currently disabled for safety.
    # if [ $? -eq 0 ]; then
    #     rm "$f"
    # fi
done

# Audio notification to signal the automation is complete.
say "Finish converting gif"
Step 6: Save and Test
- Press Cmd+S (or File > Save) and name your automation (e.g., "Auto GIF Converter").
- Test it: Drag a short
.mp4video file into your "Gifin" folder. - Wait a moment. You should hear your Mac say "Start converting to gif".
- Once finished, look for a new folder named "gifout" created right next to your input folder. Your fresh GIF will be inside!
Enjoy your new lightning-fast GIF workflow!